
Let's be real: manual data entry is where sales productivity goes to die. It’s tedious, it’s prone to error, and it’s a colossal waste of your team’s time. Salesforce's Web-to-Lead feature is the antidote, acting as a direct pipeline from your website visitors straight into your CRM.
Think of it as an automated system that grabs customer information from a web form and instantly creates a new lead record. No more copy-pasting, no more lost opportunities.
Turn Your Website Into a Lead Generation Engine
Forget sifting through contact form emails and manually typing info into Salesforce. Web-to-Lead is the first, most crucial step in building a smarter, more efficient lead generation machine. It automatically feeds your sales team fresh prospects right from your website, letting them focus on what they do best: selling.
By automating this initial capture, you slash response times, guarantee better data accuracy, and clean up your sales process from the very first click.
This isn't just a "nice-to-have." The impact of this kind of automation is huge. Companies that get their CRM implementation right see game-changing results. We're talking a 52% increase in lead volume, a 27% jump in win rates, and a 34% boost in overall sales productivity. These aren't just vanity metrics; they represent a fundamental shift in how your team operates.
Why Prioritize Automated Lead Capture?
Automating the flow of leads from your website into Salesforce delivers immediate wins that go far beyond just saving a few minutes here and there. It builds a scalable foundation for genuine growth.
Here’s what you gain right away:
- No More Stale Leads: Instead of sitting in an inbox graveyard, leads are instantly routed into your sales workflow, ready for assignment and follow-up.
- Clean, Consistent Data: Automation wipes out typos and human error. Names, emails, and company details get captured correctly every single time.
- Blazing Fast Speed-to-Lead: The faster you respond, the higher your odds of conversion. Web-to-Lead makes near-instant follow-up not just possible, but standard.
The core idea is simple: kill the friction. Every manual step between a prospect showing interest and a salesperson responding is a chance for that lead to go cold. Web-to-Lead eliminates the single biggest bottleneck in the entire process.
To give you a better sense of the overall value, here's a quick breakdown of what Web-to-Lead brings to the table.
Key Benefits of Salesforce Web-to-Lead
This table summarizes the primary advantages your business gains by implementing Web-to-Lead forms.
| Benefit | Impact on Your Business |
|---|---|
| Increased Lead Volume | More opportunities enter your pipeline without adding to your team's workload. |
| Improved Data Accuracy | Eliminates manual entry errors, leading to cleaner CRM data and better reporting. |
| Faster Response Times | Instantly assign and notify reps, dramatically improving your speed-to-lead. |
| Enhanced Productivity | Sales reps spend less time on admin tasks and more time engaging with prospects. |
| Scalable Growth | Handles any volume of leads, from a handful a day to thousands, without process changes. |
| Streamlined Workflow | Seamlessly integrates website activity with your internal sales and marketing processes. |
Ultimately, implementing Web-to-Lead isn't just a technical task; it's a strategic move that directly fuels your sales engine.
Now, before we get into the nitty-gritty of setting up forms, it’s worth noting that this tool works best as part of a well-thought-out CRM strategy. Taking the time to understand how to choose and implement the right CRM is a critical first step. Getting that groundwork right ensures you’re building on a solid foundation that aligns with your business goals from day one.
Alright, let's get that first Web-to-Lead form built. Now that you see the potential, it's time to dive in and get your hands dirty. The good news is that this is all done right inside your Salesforce org—no fancy third-party tools are needed to get a functional form up and running. What we're about to do is generate the raw HTML that will become the backbone of your lead capture machine.

First things first, head over to the Salesforce Setup menu. In the Quick Find box, just type in "Web-to-Lead." That's your shortcut to the main configuration screen where the magic happens. Look for the "Create Web-to-Lead Form" button and click it to open up the generator.
This is your command center for deciding exactly what information you need to grab from your prospects.
Choosing Your Fields Wisely
The generator screen is pretty straightforward. You'll see two columns: "Available Fields" on the left and "Selected Fields" on the right. Your job is to move only the most critical fields from left to right. This isn't just about the basics like First Name, Last Name, and Email; you can also pull in any custom fields you've created on your Lead object.
For instance, if you’re a SaaS company, you might have a custom picklist field called "Product of Interest." Adding that to your form gives your sales team instant context before they even make the first call.
But here's a pro tip I've learned the hard way: less is more. Every single field you add is another bit of friction that might cause someone to abandon your form. Start with the bare minimum your team needs to qualify and contact a lead. You can always gather more details later on in the conversation.
Nailing the User Experience
Once you've picked your fields, you'll spot an option for the Return URL. This is a huge deal. It's the page a user sees the second they hit "submit." Whatever you do, don't just leave it blank or send them back to your homepage.
A dedicated "thank you" page is one of those small details that makes a massive difference. It confirms their submission went through, sets expectations for what happens next, and gives you a golden opportunity to offer more value—like a link to book a demo or a downloadable case study.
Another setting you absolutely cannot skip is the reCAPTCHA configuration. Enabling this is non-negotiable. Trust me, without it, you're opening the floodgates to spam bots, and your sales team will be buried in junk leads. Salesforce makes it simple to plug in your Google reCAPTCHA keys, which adds a crucial layer of defense to your form.
Generating and Decoding the Code
With your fields selected, your Return URL configured, and reCAPTCHA ready to go, it’s time to hit "Generate." Salesforce will instantly spit out a block of HTML code.
Now, don't just blindly copy and paste this. Take a second to understand what you're looking at. You’ll see a few key things:
- Form Action: This is the URL that points to the Salesforce endpoint. It's how the form knows where to send the data.
- Input Fields: Every field you chose is now an HTML input tag. Each has a unique ID that maps directly back to your Salesforce Lead object.
- Hidden Fields: You'll notice a hidden field for your
oid(Organization ID). This is the secret ingredient that tells Salesforce exactly which org the new lead belongs to.
This chunk of code is your complete, functional—albeit unstyled—form. It’s ready to be passed to your web developer or dropped right into your website's HTML. From here, the next step is all about making it look good and adding tracking to turn this simple form into a powerful asset for your business.
Customizing and Embedding Your Form for High Conversions
The raw HTML that Salesforce spits out is a solid starting point, but let's be honest—it’s not going to win any design awards. To turn that basic code into a lead-generating machine, you need to inject your brand's personality and add some smarts behind the scenes. This is where your web to lead Salesforce form goes from being just a tool to a seamless part of your customer experience.
First things first, let's talk visuals. Your web developer or marketing team can easily apply your website's existing CSS to the form. This little tweak ensures that your fonts, colors, button styles, and spacing all align with your brand, creating a look that feels professional and trustworthy. A form that looks like it doesn't belong can send bounce rates soaring, so brand consistency is non-negotiable.
Enhancing Your Form With Hidden Fields and Spam Protection
Beyond the look and feel, some of the most powerful customizations are the ones your visitors will never even see. Hidden fields are your secret weapon for gathering crucial marketing intel without making your form longer or more complicated.
With a simple line of HTML, you can automatically capture incredibly valuable data:
- Lead Source:
<input type="hidden" name="lead_source" value="Organic Search"> - Campaign ID:
<input type="hidden" name="Campaign_ID" value="XYZ-2024-Q4-Blog"> - Content Offer:
<input type="hidden" name="Content_Offer" value="Ultimate-Guide-eBook">
This data flows right into Salesforce, giving your team immediate context on what brought that lead to your door. It’s a foundational step for really understanding and dialing in your marketing ROI. For a deeper dive into the mechanics of building effective forms, check out our guide on the topic: https://www.distro.so/blog/lead-capture-forms.
Another critical step is adding spam protection. Salesforce makes this easy by including an option to enable Google reCAPTCHA. You just need to grab your keys from Google and plug them into your Salesforce setup.
Skipping reCAPTCHA is like leaving your front door wide open. It’s an essential security layer that stops spambots from flooding your CRM with junk data, saving your sales team from wasting countless hours chasing ghosts.
Embedding and Testing Your Form
Once your form is styled, secured, and ready to go, it’s time to get it live on your site. This is as simple as copying the complete HTML code block and pasting it right where you want it—on a landing page, your contact page, or even in a blog post. Most modern content management systems like WordPress have an HTML block that makes this a breeze.
The image below shows you the Salesforce interface where you'll lock in your settings right before generating the code.

This screen is your final checkpoint, confirming the fields you've chosen and, most importantly, the Return URL where you'll send visitors after they hit submit.
After embedding the code, you absolutely have to test it. I mean, really test it. Submit the form with different kinds of test data to make sure leads are being created correctly in Salesforce. Check that every single field—standard, custom, and hidden—is populating exactly as you expect. Building the form is one thing, but knowing how to track its performance is key to getting the most out of it. There are some fantastic resources out there for optimizing contact form conversions.
When you combine smart customization with rigorous testing, your Salesforce web-to-lead form becomes a powerful, reliable engine for business growth.
Automating Lead Routing with Assignment Rules
Getting a lead through your web form is only half the battle. The real magic happens in what you do next. A lead sitting untouched in a generic queue is a golden opportunity slipping through your fingers, losing value with every minute that passes. This is where you can truly unlock the power of your web to lead Salesforce setup by automating how every single prospect is handled from the moment they hit "submit."
The goal is simple: get the right lead to the right person, instantly. Salesforce makes this incredibly straightforward with Lead Assignment Rules. Think of them as an intelligent traffic controller for your inbound leads. No more manual sorting, no more guesswork.
Building Your First Assignment Rule
A lead assignment rule is basically a set of if/then instructions. Each instruction, or "rule entry," tells Salesforce to scan a new lead for specific criteria. If there's a match, that lead is automatically routed to a designated user or a specific queue.
You can build this logic around pretty much any field on the lead record. I've seen it all, but some of the most effective setups include:
- Geography: If the "State" field is "California," send it straight to your West Coast sales team's queue.
- Product Interest: If a custom "Product" field contains "Enterprise," route it directly to a senior account executive who knows the high-value deals inside and out.
- Company Size: If "Number of Employees" is over 500, that lead belongs in your enterprise sales queue, not with the SMB reps.
This approach ensures leads are not just assigned quickly, but with crucial context. Your team can tailor their outreach from the very first touchpoint. A solid lead routing strategy is the engine that drives your entire sales process, and you can dive much deeper into advanced techniques for lead routing in Salesforce to really fine-tune your process.
The core benefit here is speed-to-lead. When a prospect from Texas interested in your core product is instantly assigned to the Dallas-based rep who specializes in that solution, your chances of a meaningful conversation skyrocket.
Here’s a quick look at how you might structure these rules. The order matters, as Salesforce stops at the first match.
Example Lead Assignment Rule Logic
| Rule Order | Criteria (Example) | Assign To |
|---|---|---|
| 1 | Country = USA AND State = CA, OR, WA | West Coast Sales Queue |
| 2 | Country = USA AND State = TX, OK, LA | Central Sales Queue |
| 3 | Industry = Technology AND Employee Count > 1000 | Enterprise Tech Team |
| 4 | Product Interest contains "Core Platform" | Core Product Specialists |
| 5 | No criteria met | Inbound Lead Queue |
This kind of tiered logic ensures your most valuable or specific leads get specialized attention first, while everything else is caught by a general queue for manual review.
Don't Forget the Immediate Follow-Up
Just as important as routing the lead internally is acknowledging the submission on the prospect's end. This is where Salesforce's Auto-Response Rules come into play. They work just like assignment rules, triggering a specific email template based on the lead's information.
You can set up different responses for different actions. A demo request could trigger an email with a Calendly link, while an eBook download could send an email with the PDF and a link to a relevant case study. This immediate, personalized feedback confirms you got their info and keeps them engaged while your team gets ready to connect.
The diagram below shows the basic data flow, from the moment a user fills out your form to the creation of a Salesforce record, which is the foundation for all this automation.
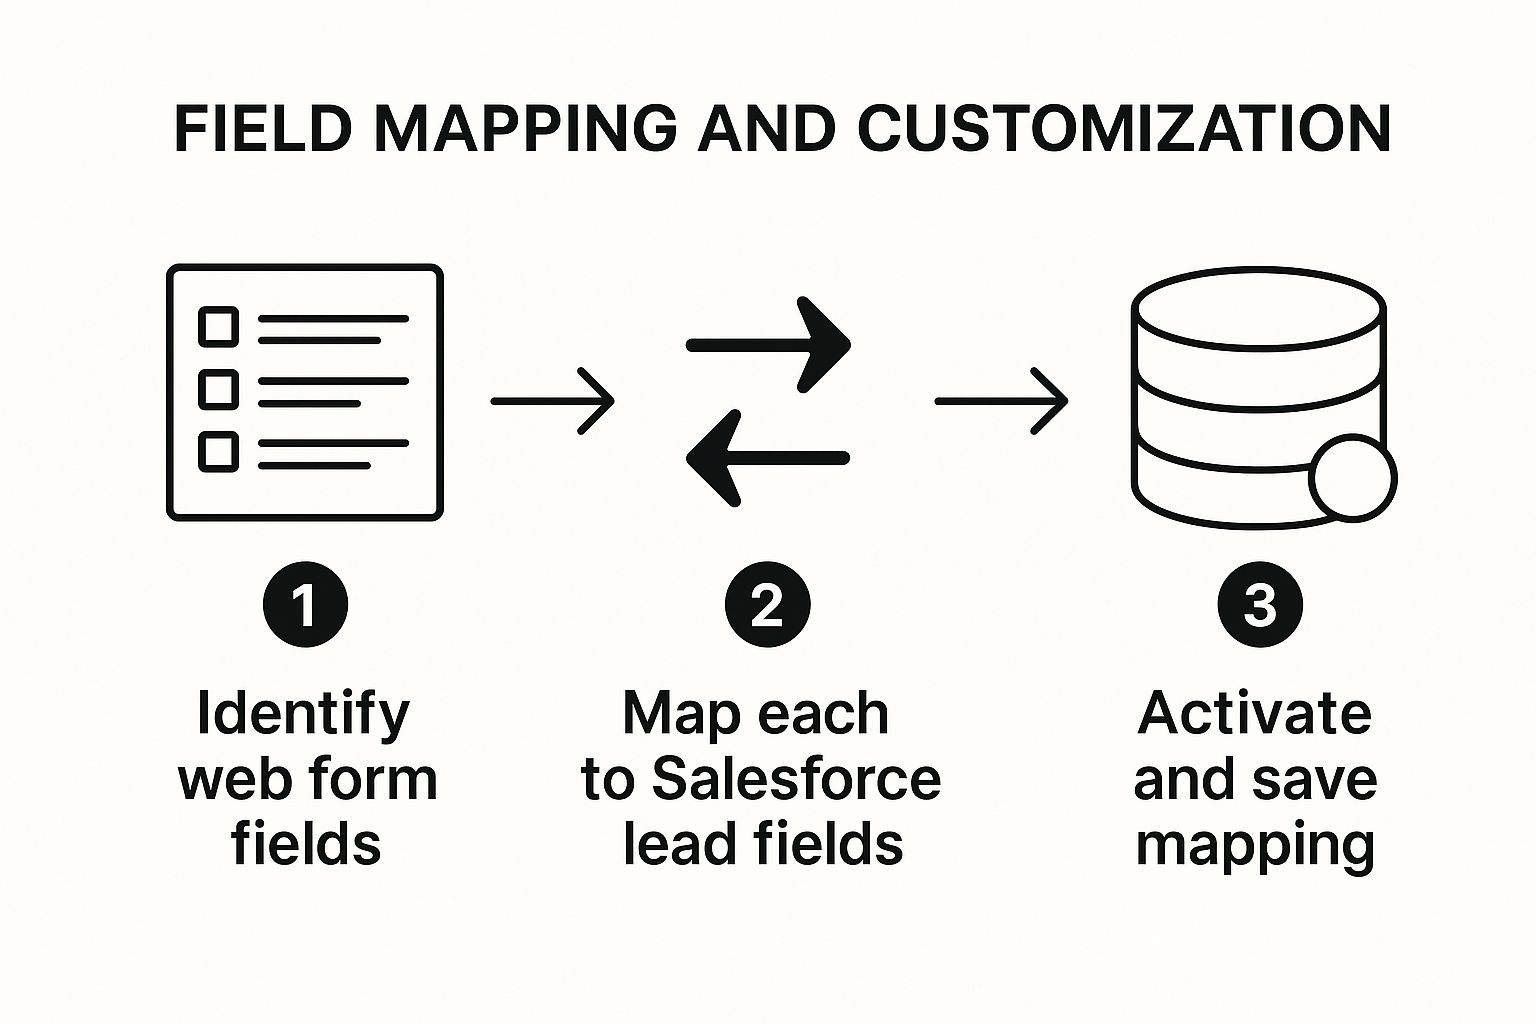
This visual really clarifies how data from your website is systematically captured and stored in Salesforce, making it instantly available for your assignment and auto-response rules to kick in.
Testing Your Setup and Solving Common Problems

Let’s be honest: launching a new form without testing it is just asking for trouble. Before you let a single real prospect touch your new web to lead Salesforce form, you need to put it through its paces to make sure everything works exactly as you planned.
Start with the basics. Submit a few test leads using different data. I always use unique email addresses for each submission—it makes tracking them down inside Salesforce way easier. This is your first and most important sanity check.
Once you hit submit, hop into your Salesforce org and find those test leads. Don't just glance to see if they're there. You need to dig in and confirm every single field from your form mapped correctly to the right field on the lead record. Data ending up in the wrong place is a silent killer of good marketing ops.
A Practical Testing Checklist
Okay, so the data is getting in. Now, what about all the automation you built around it? A systematic check ensures the entire process, from the moment a user clicks "submit" to the lead landing with the right rep, is seamless.
Run through these key checkpoints for every test submission:
- Assignment Rules: Did the lead go to the right person or queue? Try a few variations based on your rules, like submitting leads from different states or with different product interests to see if the logic holds up.
- Auto-Response Emails: Check your inbox. Did the auto-responder fire correctly? Look closely at the content, make sure any personalization tokens pulled the right data, and confirm the sender details are correct.
- Campaign Connection: If you’re using hidden fields to tie submissions to a marketing campaign, is that connection showing up on the new lead record?
- Hidden Field Data: Pop open that new lead and verify all your hidden field values, like "Lead Source" or any UTM parameters, were captured perfectly.
Getting this process right is crucial. After all, a new lead is only valuable if you can act on it effectively. If you want to dive deeper into what happens next, you should brush up on best practices for lead conversion in Salesforce.
Troubleshooting Common Headaches
Even with the most careful setup, sometimes things just don't work. If your test leads are nowhere to be found, don't panic. It's usually one of a few common culprits that trip up even veteran admins.
The first place I always look is the HTML code itself. I've lost count of how many times a simple typo or a misplaced character in the code embedded on the website has broken the entire thing. Always double-check your code.
Another common issue is hitting your daily Web-to-Lead limit. For most Salesforce editions, this is capped at 500 leads per 24-hour period. If you're expecting a flood of sign-ups from a launch, you’ll need a plan for this.
Finally, take a hard look at your org’s validation rules and required fields on the Lead object. If your form doesn’t capture a piece of information that Salesforce considers mandatory, it will silently reject the submission, and no lead will be created.
Common Questions About Web-to-Lead in Salesforce
Even with the perfect setup, questions are going to pop up. Once you start digging into the details of your **web to lead Salesforce** implementation, you'll inevitably run into some unique challenges and opportunities. This is where we tackle the most common questions we hear from teams just like yours.Think of this as your go-to reference for fine-tuning your lead capture strategy. We'll give you clear, straightforward answers to help you navigate the practical stuff, from daily limits and data security to the fun world of advanced customization.
Is There a Limit to Submissions?
This is easily one of the most frequent questions we get. The short answer is yes, Salesforce does have a default processing limit for Web-to-Lead submissions. For most editions, you’re looking at a cap of 500 new leads within a 24-hour period.
If you're gearing up for a big marketing campaign or a product launch that you expect to drive a surge in traffic, this limit is absolutely critical to keep in mind. Once you exceed it, any subsequent submissions simply won't get processed, and you'll get an email notification letting you know you've hit the ceiling. Planning ahead for these high-volume days is essential to avoid losing out on valuable leads.
This daily limit is a classic "gotcha" that catches a lot of teams by surprise. It's exactly why you need to monitor your lead flow and have a game plan for high-traffic days—it’s non-negotiable for a reliable setup.
How Can I Prevent Duplicate Leads?
Nothing clutters a CRM and frustrates a sales team faster than duplicate data. The good news is you can get ahead of this. Salesforce's built-in Duplicate Rules are your first and best line of defense.
You can set up these rules to check for matching records based on specific criteria—like an email address or company name—before a new lead ever gets created. When a potential duplicate is flagged, you can decide whether to block its creation completely or just flag it for a manual review. This is how you keep your data clean right from the point of entry.
Advanced Customization and Security
Once you've got the basics down, you'll probably start wondering how far you can push the feature. Here are a few common advanced topics that come up all the time:
- Multiple Forms: Can you have more than one form? Absolutely. You can create and manage multiple Web-to-Lead forms, each one tailored for different websites, landing pages, or specific campaigns. This lets you capture unique information and even route leads to different teams automatically.
- Custom Fields: Any custom field you've created on your Lead object can be added to your form. This is perfect for gathering hyper-specific information that matters to your business, like "Product Interest" or "Preferred Contact Method."
- Security: This one is important. The native reCAPTCHA support is limited to Web-to-Lead and, crucially, doesn't extend to Web-to-Case. If you need to protect other forms from spam, you'll need to look into a custom implementation. It's a key security distinction to remember.
Ready to stop leads from slipping through the cracks? Distro automatically routes high-intent prospects from your forms to the right sales reps' calendars, tripling demo request conversions. See how it works at https://distro.so.